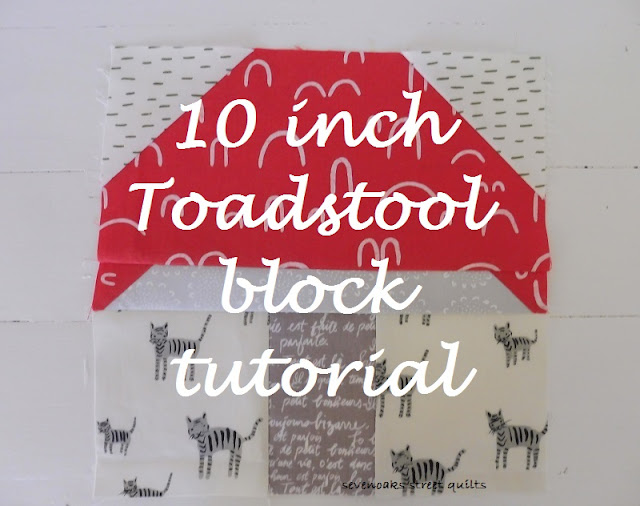
This month I’m queen in Stash Bee and we’re
making a toadstool block. I figured I might as well share the tutorial here as
well.
The block has been tweaked – up scaled, turned
into a square, simplified slightly, and the tiny HST units have been removed
(you’re welcome) – from this tutorial by I am LunaSol. It turns out that it now looks very similar to this block by Patty Sloniger. When I couldn’t find
the pattern in her shop I checked with her and she has given her consent to me
using it so long as I let you know that she came up with it first. I’m more
than happy with that!
I’ve chosen a red and white print for the
toadstool top, low volume prints for the background, a mid grey print for the
stem and a pale grey print for the gills.
CUTTING INSTRUCTIONS
From the toadstool top fabric
Cut
one rectangle 5 ½” x 10 ½”
Cut
two 1 ½” squares
From the gills section fabric
Cut
one 1 ½” x 10 ½” rectangle
From the stem fabric
Cut
one rectangle 4 ½” x 3”
From the background fabric
Cut
two rectangles 4 ½” x 4 ¼”
Cut two
3 ½” squares
SEWING IT TOGETHER
Mark the diagonals on the two background
squares and the toadstool top fabric squares
Line the background squares up in the corner of
the toadstool top rectangle so the line cuts across the corner, and the same
for the toadstool top squares on the gills section rectangle. Stitch along the
marked line. Trim ¼” from the stitched line and press.
Stitch the two background rectangles to either
side of the stem fabric rectangle. Stitch the three sections together to form a
toadstool.
And we’re done!
If you make any of these I would love to see
them! Tag me on Instagram @sevenoaksstreetquilts or #10inchtoadstool or email
me.
I’ll be linking this up to Cheryl’s (Meadow Mist Designs) and Yvonne’s (Quilting Jetgirl)
bi-yearly tutorial link up.


What a great tutorial and clever block! I look forward to seeing the blocks you receive and quilt you make using them. :)
ReplyDeleteThank you for linking up to the Tips and Tutorials Festival!
DeleteGreat tutorial Sue, love the block and the fabrics you chose. I would have enjoyed making this for Bee Inspired.
ReplyDeleteCute block! I would have enjoyed picking out just the right fabrics for this one. Can't wait to see the quilt with all of these in it!
ReplyDeleteGreat tutorial and cute block! Love that you chose red, so perfect!
ReplyDeleteGreat tutorial and block! Thanks for planning on linking it in the festival!
ReplyDeleteThis gets my vote!
ReplyDeleteI love how you simplified this toadstool block pattern.
ReplyDelete