Wednesday, 30 May 2018

Regatta Cushion – a finish (with faux binding)!


It’s taken me a ridiculously long while, but I have finally finished my Regatta Quilt Along project – this cushion.


I wrote about it when I finished the top back in early February. The QAL is being held by Roseanne over at Home Sewn By Us. This is a Quilt Along with a start date but no set finish, so you can pick it up whenever you like throughout the year. I decided on a seaside inspired cushion, so I downsized the pattern by making the strips only 1 inch wide finished and reducing the number. I love the stripe variation this pattern gives. The free pattern is by Block M Quilts and is available here. You can see a number of different versions on Instagram here (you don’t need to sign up to see them).


I took these photos on a bit of a dull day (finally some much needed rain) so I wasn’t sure if the lighting was going to be okay in them. As it turned out they were all fine so now I have a lot of photos of a cushion in various spots around my house, that probably definitely look extremely similar.


Except this one. I made an envelope backing (my favourite method) and used a faux binding. In this shot you can see the seam where the front and back meet.


And you can see in the others that I added a border around the central block after quilting and before trimming (yes, there is batting in there and you could definitely quilt it if you wanted to). I made the border size wider than I would ordinarily end up with if I was binding it, from memory I think it is ½ inch finished. The backing is sewn right sides together to the front section and then turned right sides out before stitching in the ditch.


Finished size is to fit a 16-inch square insert.

Happy sewing
Sue

I think this qualifies for UFO busting with Tish

Wednesday, 9 May 2018

Pantone Challenge 2018 Neighborhood Quilt – a top!


This is the third year I’ve entered the Pantone Color of the Year quilt challenge (other posts are here and here) and I admit to being a big fan of the process.


Putting a quilt together using a colour you wouldn’t ordinarily choose is often a stretch but I’ve always been surprised at how much I like the finished result.


This year’s is no exception. I used the Neighborhood pattern from Elizabeth Hartman’s book Modern Patchwork.


It feels good to actually make something from the books on my bookshelf for a change and I will definitely attempt to do more of it, since I’ve got a stack of them.


I had the quilt magnetted (is that a word?) to the shed for at least half a day while I waited to see if the light would be just right for the photos. Eventually my patience was rewarded but I kind of like the ones with the dappled light playing on them too.


I was hoping that this quilt would suit my sewing room as a wall hanging so I taped it up on the wall and, yep, it got the big tick of approval. The quilt top finishes at 45 inches by 60 and is now placed somewhere amongst the others waiting to be quilted.

Many thanks to Sarah and Rebecca of No Hats in the House and Bryan House Quilts for making this possible. To assist in putting me into the right prize category - I'm in Australia.


Once the link up closes you get a chance to vote for your favourites so head over and have a look!

Happy sewing

Sue


Tuesday, 1 May 2018

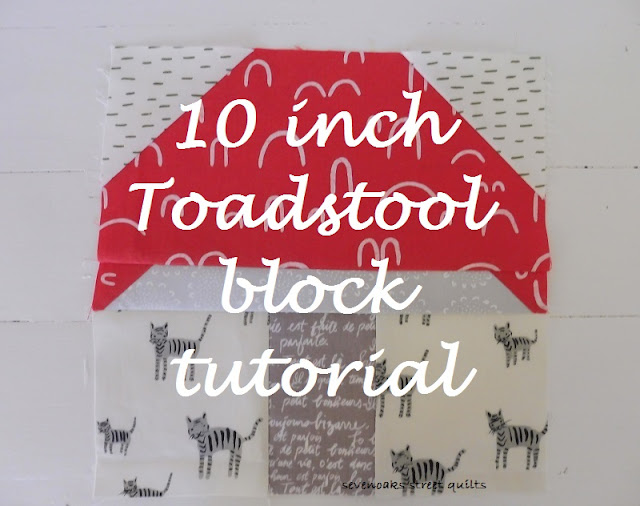
10-inch Toadstool Tutorial


This month I’m queen in Stash Bee and we’re making a toadstool block. I figured I might as well share the tutorial here as well.

The block has been tweaked – up scaled, turned into a square, simplified slightly, and the tiny HST units have been removed (you’re welcome) – from this tutorial by I am LunaSol. It turns out that it now looks very similar to this block by Patty Sloniger. When I couldn’t find the pattern in her shop I checked with her and she has given her consent to me using it so long as I let you know that she came up with it first. I’m more than happy with that!
I’ve chosen a red and white print for the toadstool top, low volume prints for the background, a mid grey print for the stem and a pale grey print for the gills.


CUTTING INSTRUCTIONS

From the toadstool top fabric
          Cut one rectangle 5 ½” x 10 ½”
          Cut two 1 ½” squares

From the gills section fabric
Cut one 1 ½” x 10 ½” rectangle

From the stem fabric
          Cut one rectangle 4 ½” x 3”

From the background fabric
Cut two rectangles 4 ½” x 4 ¼”
Cut two 3 ½” squares

SEWING IT TOGETHER


Mark the diagonals on the two background squares and the toadstool top fabric squares
Line the background squares up in the corner of the toadstool top rectangle so the line cuts across the corner, and the same for the toadstool top squares on the gills section rectangle. Stitch along the marked line. Trim ¼” from the stitched line and press.


Stitch the two background rectangles to either side of the stem fabric rectangle. Stitch the three sections together to form a toadstool.


And we’re done!

If you make any of these I would love to see them! Tag me on Instagram @sevenoaksstreetquilts or #10inchtoadstool or email me.

I’ll be linking this up to Cheryl’s (Meadow Mist Designs) and Yvonne’s (Quilting Jetgirl) bi-yearly tutorial link up.

In the meantime, I’m linking up to Lorna at Sew Fresh Quilts, Needle and Thread Thursday at My Quilt Infatuation and Wednesday Wait Loss at The Inquiring Quilter